Blog design and digital scrapbooking elements created by Adori Graphics »

Thursday, February 28, 2013

Bye Bye Ceiling Fan Brass

As promised, here is a post about some of the updates going on around here.  I know you've been biting your nails waiting for this!

All of the ceiling fans in this house were stuck in 1990.  Brass was popular.  Brass was shiny.  It was in. I've since decided that I don't like shiny and bright staring down at me from the ceiling.  I was not going to spend hundreds of dollars to replace the ceiling fans, so I splurged on some paint.

Nothing short of incredible transformations I must admit.  I used spray paint and a new product I had never used before called Sophisticated Finishes.  This stuff is awesome, by the way.  The product comes in many colors, you can get the antique or rust look by appyling their patina colors.  It has real metal in the paint, can be used indoors or outdoors, and a little 4 oz bottle ran me less than $10 at Michaels with a coupon. 

I spray painted Kennedi's ceiling fan and our bedroom fan; I used the Sophisticated Finishes and brushed on the paint on Andrei's and our living room fan.  I still have Annsley's fan to update.  Spray vs brush on?  Brush on was SO MUCH EASIER!  It was less messy by far and I didn't nearly pass out because of the fumes.  The con would be you don't get that super smooth look that you do from spray paint, but in my opinion, you only notice that if you get super close (and I don't know anyone who is going to get a step ladder to check out my paint jobs anyway.)

Here are some pictures and the tale of my spray painting woes to go along with.  (Remember, I'd share the ugly with you too...) I sanded everything that was going to be painted but I didn't use primer.  If I'd been painting over something that was going to get touched alot, I'd do it differently.  But really, how often do you get up on a ladder and finger the metal of your ceiling fan?

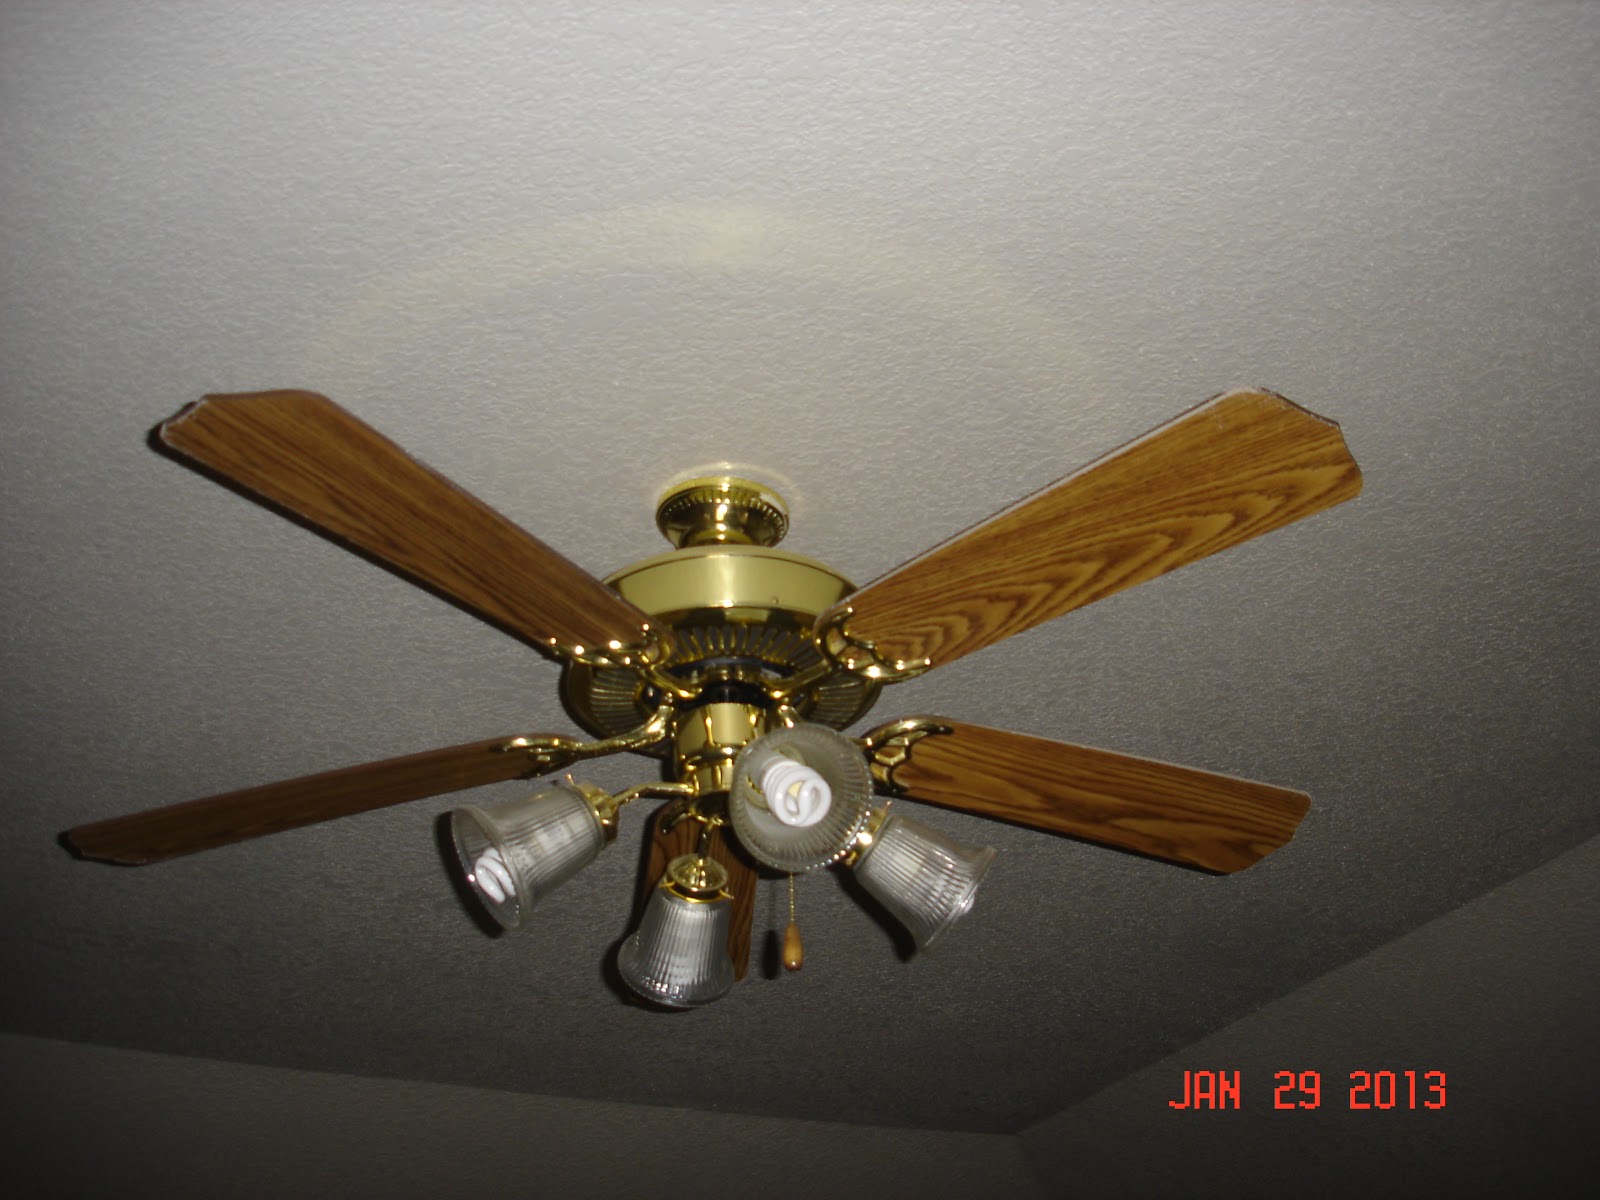
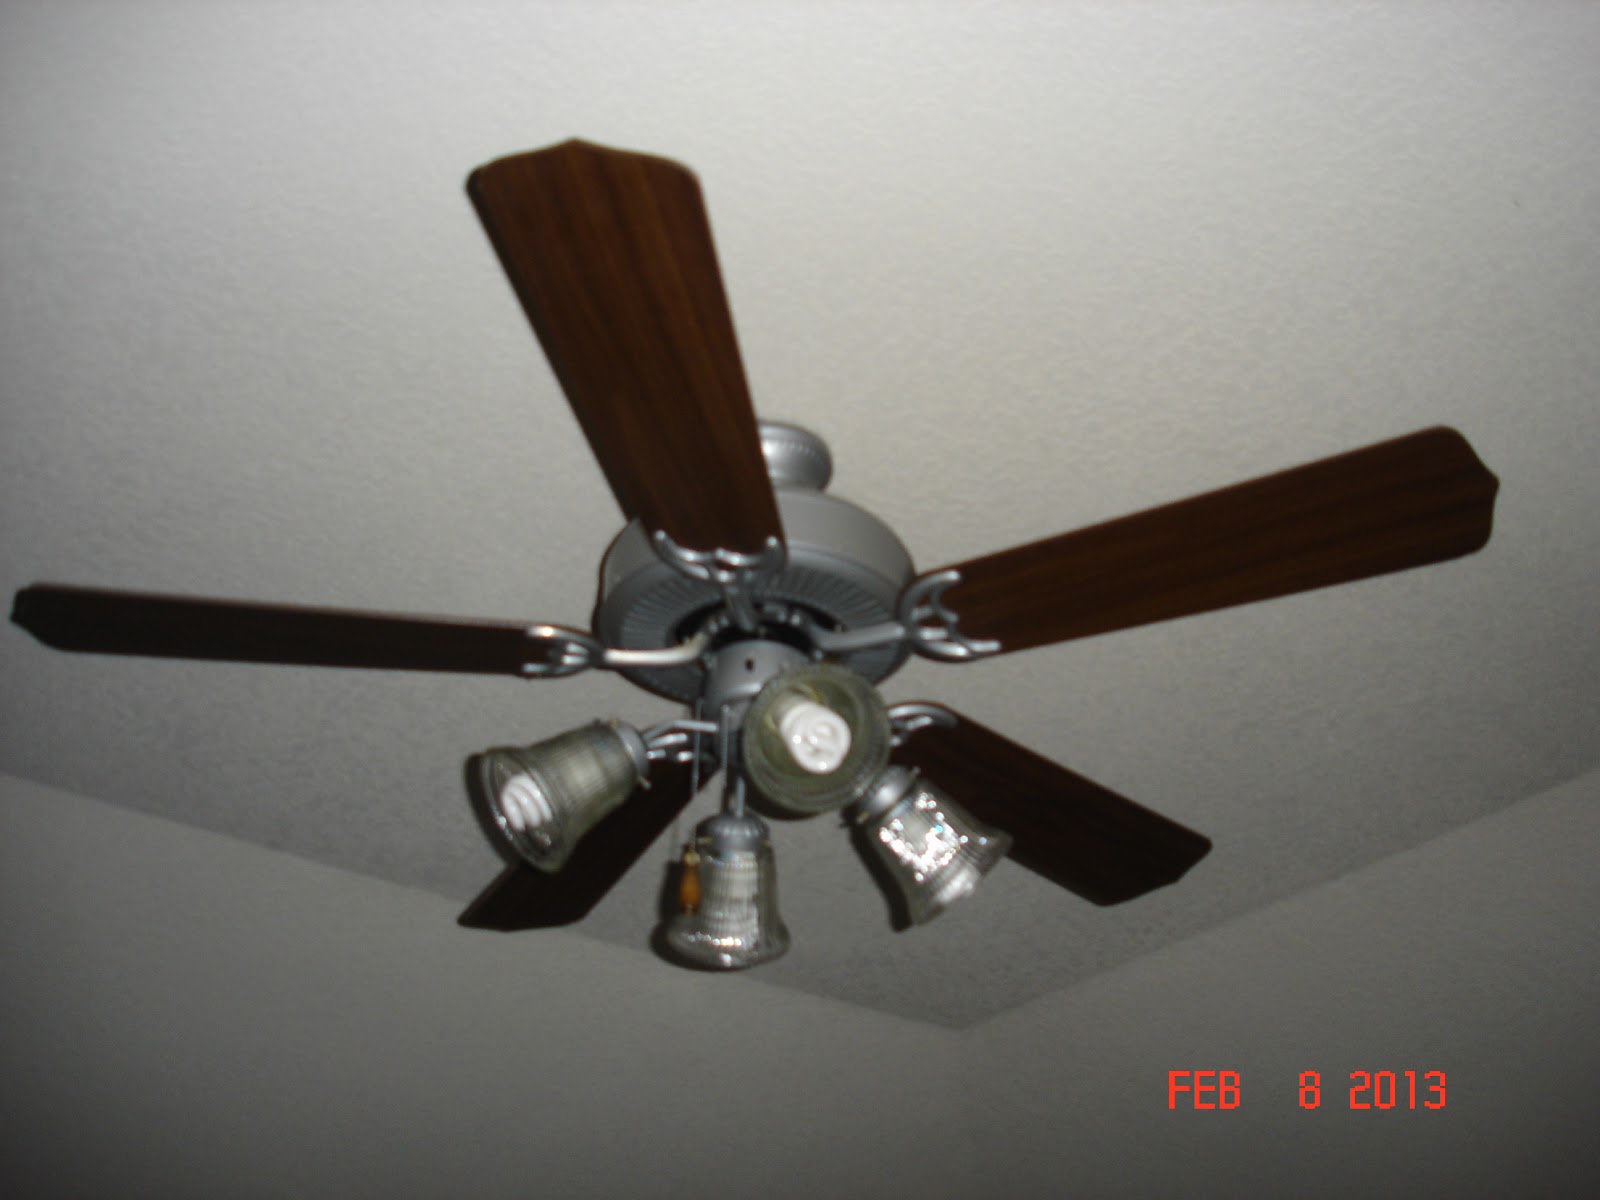
Ceiling fan that came with the house.


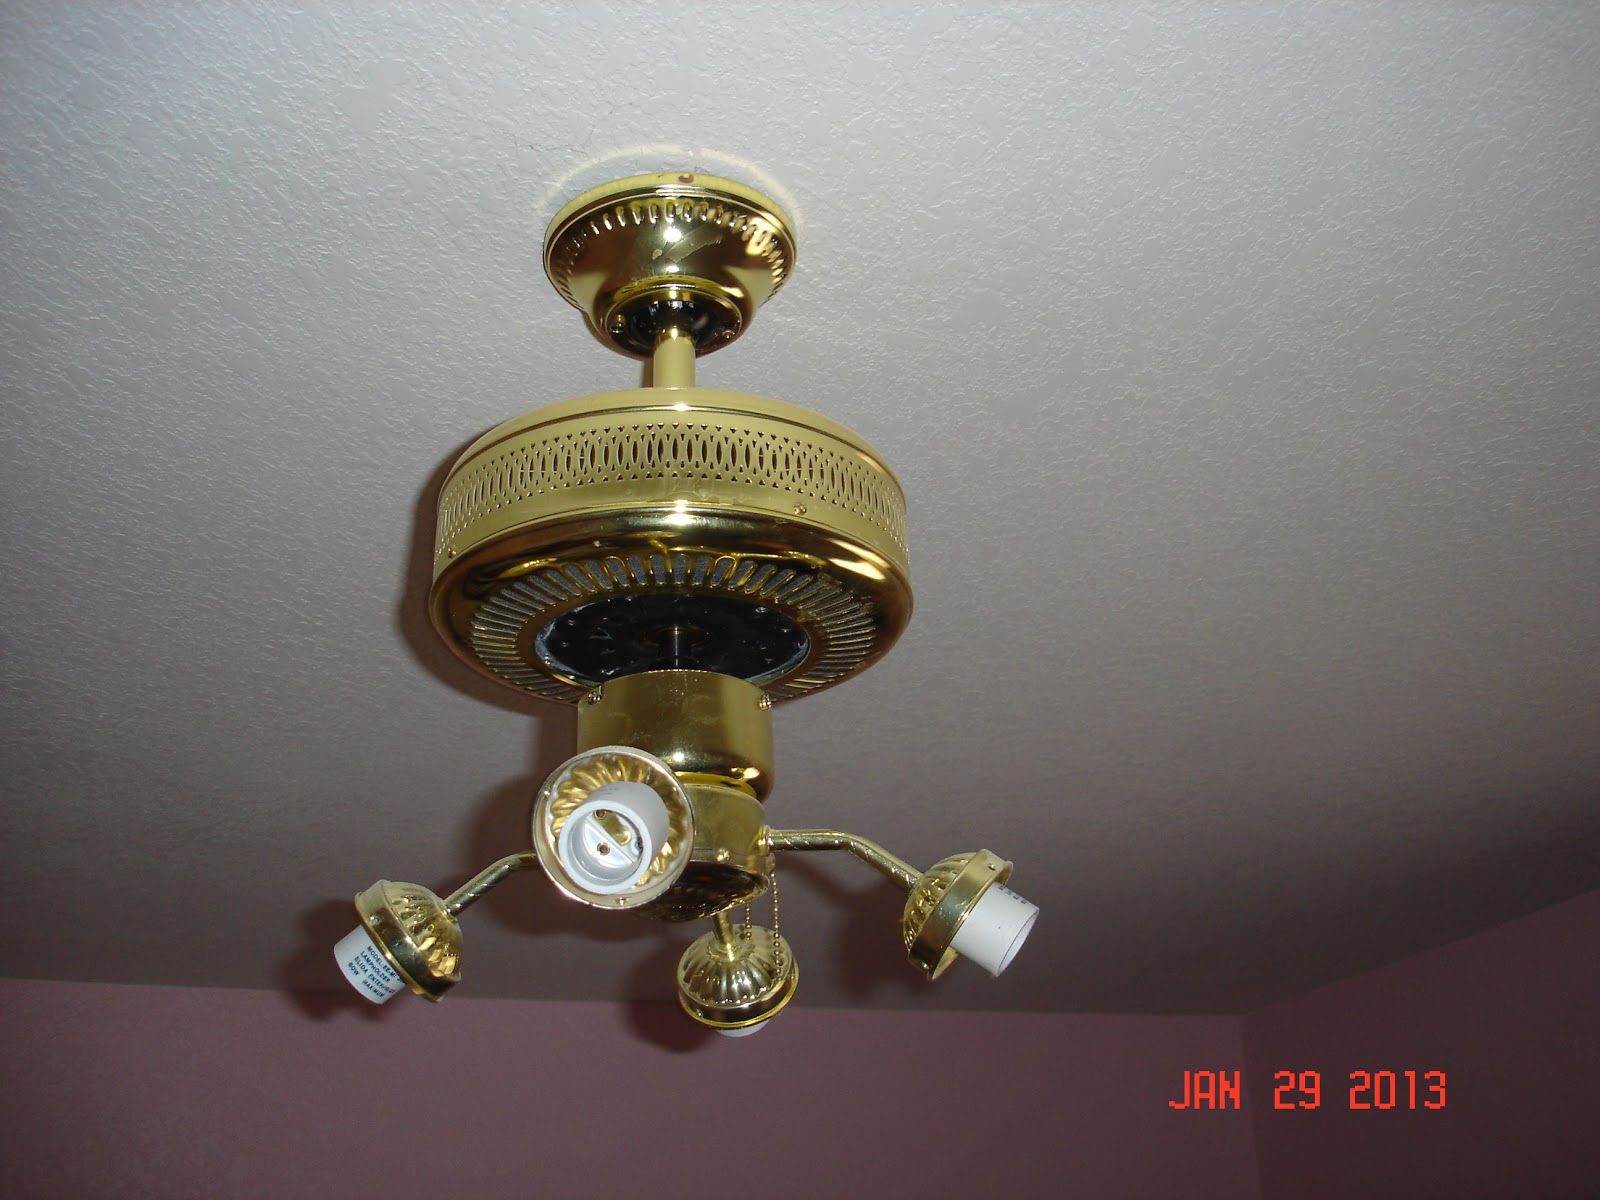
I took down the blades, arms, and gave everthing a good cleaning with soap and water.

Sophisticated Finishes in Blackened Bronze, coat #1.  Doesn't look very promising at this point...

Painting the arms.  Use a smooth foam brush for less paint lines!


Coat #2...still having problems but getting better.

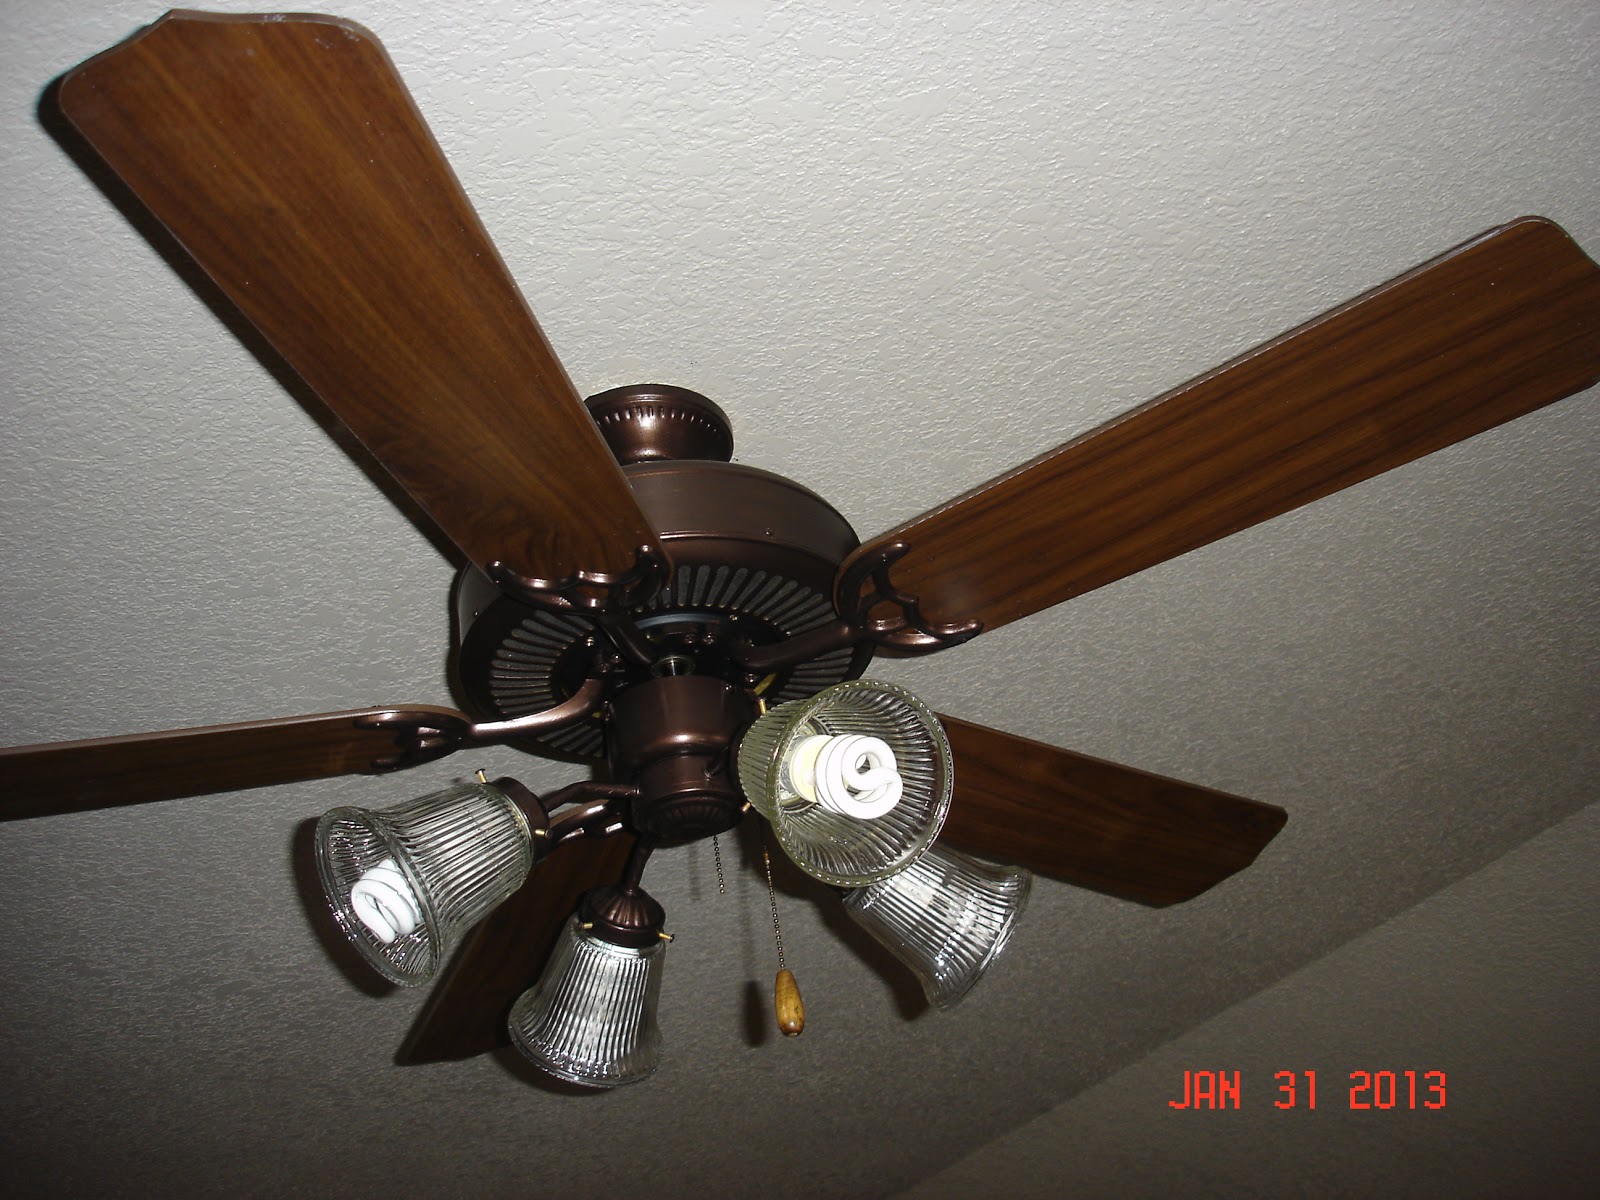
I flipped the ceiling fan blades over to the darker espresso finish.  With a third coat of paint, ceiling fan looks AWESOME!

Kennedi's fan with gobs of paper hung around it to catch the overspray. It took longer to protect the stuff I didn't want to have semi-gloss white on it than it took me to actually spray the fan.


I taped off one side of the fan blades because I was going to paint one side satin white and the other a rainbow of colors. 
  Now, at this point, Kennedi's ceiling fan update is going well.  I've managed to spray paint her fan blades a different color (green, pink, yellow, purple, and orange) and I have waited 24 hours and have flipped them over to paint the other side white.  I have my fan blades out on the driveway on top of newspaper.  It is a calm day.  I spray them.  I wait 10 minutes.  I spray coat #2.  I go inside to wait.  I all of a sudden hear a gust of wind roar outside.  Not good.  I go out to the driveway and two of my fan blades are flipped over and the the newspaper is sticking to them.  They will now have to be stripped.

I find some old paint stripper in a box and wipe them down with it.  Unfortunately, some of it bleeds over to the "good" side, so the orange and yellow side will have to be repainted as well.  I scrape off the paint, and clean them up. 

Now it is day #3.  I start with the colored side.  I obviously did not get all the stripper off because within 30 minutes, the newly painted orange and yellow are showing cracking and splitting of the paint.  Great.  I scrape that off and clean them again. 

Now it is day #4.  I spray them again.  They are not looking as great as they did the very first time, but at this point I'm getting a bit ticked and don't care.  I'm beginning to feel like I'm being held hostage by her fan.

Day #5.  I turn the blades over and spray the other side white.  15 minutes after spraying coat #3 I noticed this:
Somebody has stepped on my newly painted fan.  To this day I can't identify the foot print, but I'm still looking....
Instead of stripping them AGAIN, I just layer on the paint to make them somewhat smooth.  At this point I'm more than willing to fork out the $15 bucks for new fan blades...


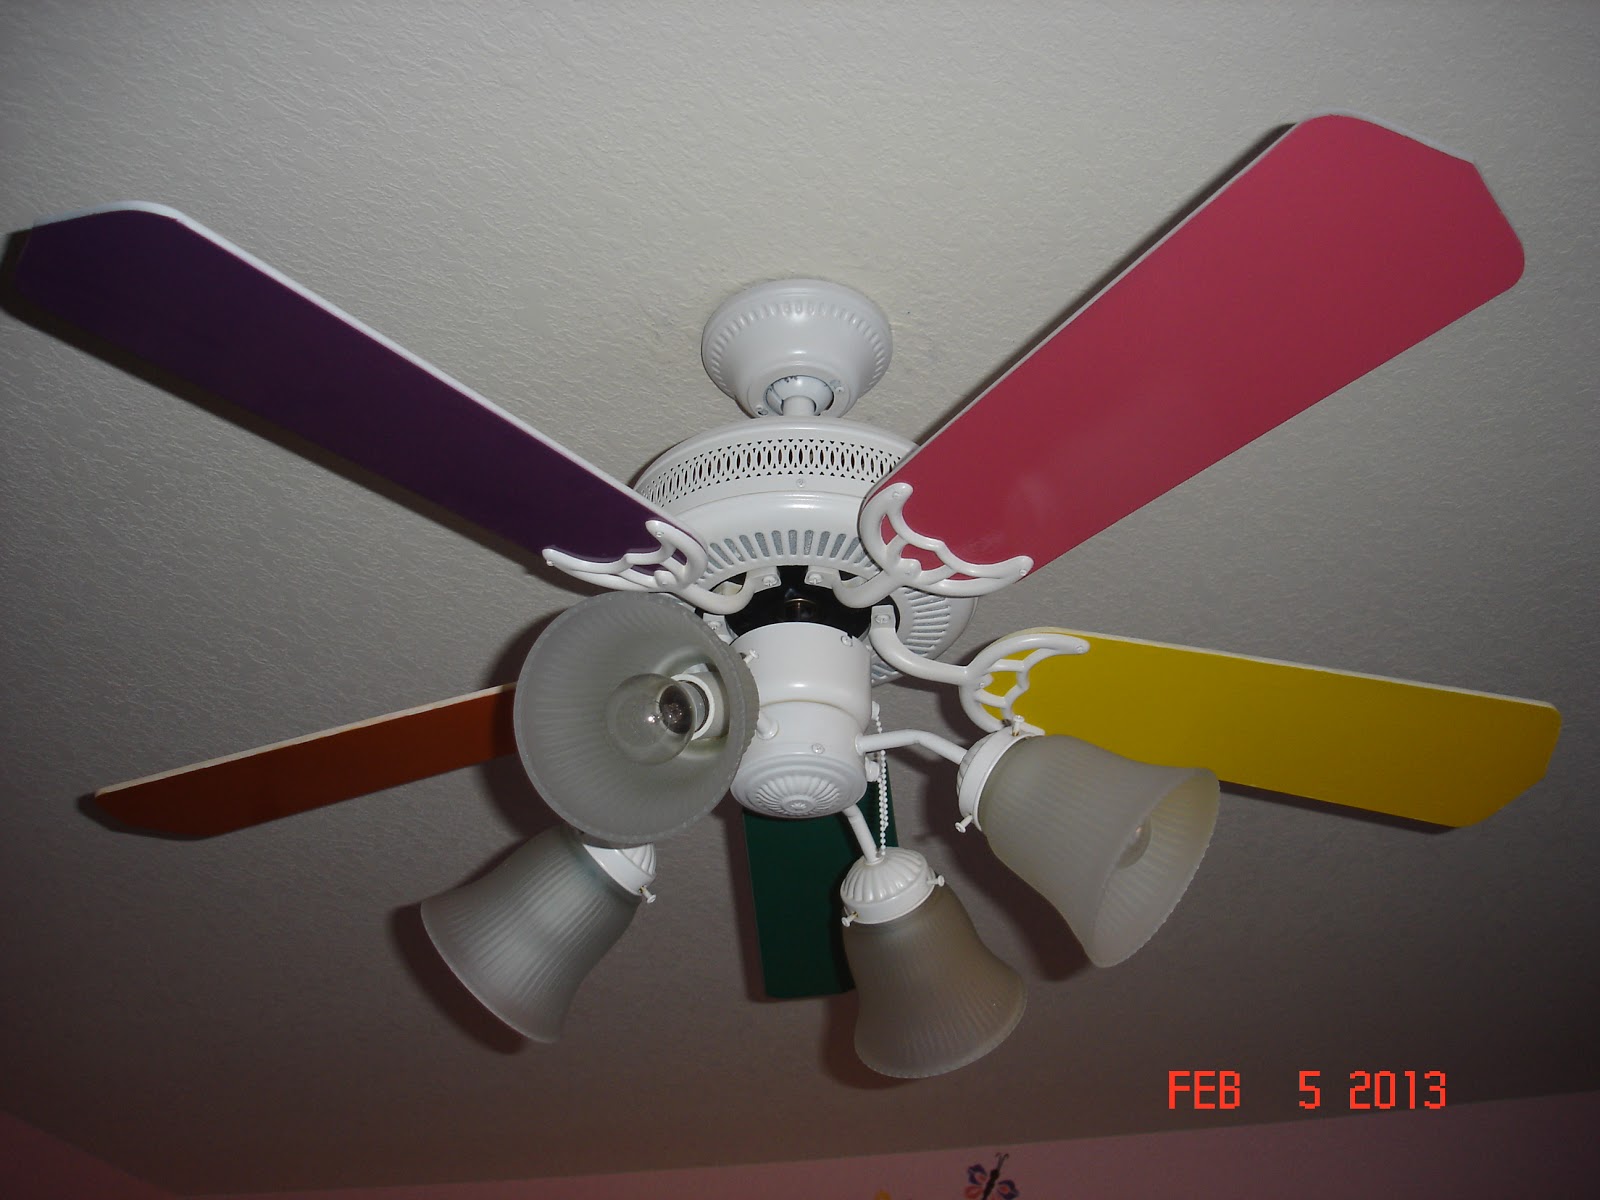
Kennedi's fan finally finished after 6 long grueling days...


My favorite ceiling fan: our bedroom fan spray painted with hammered silver spray paint.  I just flipped the blades over to the darker side. 

Tuesday, February 26, 2013

Snowstorm Rocky, a Birthday, and Wine

Come on, I know you're trying to decide whether to click on Boy George or not...Go ahead and do it...Get it over with...

It's been a crazy, busy last 10 days.  Our little man turned three!  I flew to San Antonio to visit my sister.  We've entertained the 2nd worst blizzard snowstorm (Rocky) in our Panhandle history--or US history (I make that statement of 2nd hand knowledge told to me by my husband...)--the most dumped in a 12 hour period or something like that--So I've been told anyway. I'm not sure how much we got--17-18" inches?? maybe more??  (You know you're in the big time when the Weather Channel talks about you! LOL  I had no idea that they named winter storms now...)

We're currently on our 2nd snow day of cancelled school.  We have good 4 foot drifts in our yard thanks to the 50 mph winds during the snow dumping of 2013.  Thankfully we only lost our electricity for about an hour.  It was the first time our girls have been through the despair of not having Thomas Edison's invention at their beckon call. 
"Oh Momma! It's a great day to watch movies all day."  Sorry, can't do that.  "How about some hot chocolate?"  How about some cold chocolate?  "Can we play our DS's?" Not if they are not already charged... It was a sobering reality for them. 

This morning the three little ones and the one big one are venturing out to make a snowman family.  We have enough to build the Duggars.

My weekend in San Antonio was met with wonderful 70-75 degree weather.  We hit the vineyards for some wine tasting on Friday.  Contrary to what you may be thinking, it was very, very educational. Really.  I found out that port is nasty--no matter who makes it.  I verified what I had already known--that I don't like red wine.  I stayed in the white sweet wines.  Reisling is very very tasty.  I can also see why one might require the service of a limo after visiting south Texas's wine country. Had we ventured to a third winery, we might have needed a limo ourselves. My sister tells me it's the #2 wine country in the USA.  We ate at the Pink Pig and then ventured into Fredricksburg for some over priced shopping. 

All was well until my sister forced me to listen to her Culture Club CD on the way home.   Kristin has always been a European music band junkie.  She was a card carrying member of Duran Duran (who knows..she might secretly still be one...).  Listening to Boy George took me back to my freshman year in high school.  Unfortunately, I still remembered the words and probably sang out of tune to Karma Chameleon on the way home.  She says she draws the line at Elton John, but I figure if she likes Wham! she's got to be a closet Elton fan as well.  (Please click on the above video for stirring 80s music flashblack for all you 40 year olds!)

Here are some pictures of Andrei's birthday party and our snow storm. 
Yes, parts of our yard are bare of snow.


Wanting to have nothing to do wit blowing out his candles.

Enjoying his cake!

Thursday, February 7, 2013

Renovation, Remodel, or Update?

Ah, yes, I have a blog.  I haven't been blogging.  But you know that.  Again I give my apologies and hope to do better in the future.  I seem to go in spurts. 

But this time a I have very, very good reason for my absence.  We have been super busy working on our house.  Yes, the purple carpet is up in all the rooms except the girls' bedrooms and ours.  It'll go a bit later but it's going.  That's the important thing.  I'm not sure if what we're doing qualifies as a renovation, remodel, or simply an update.  It might be all three.  I'm thinking a renovation involves moving stationary things such as walls and doors.  We have that.  A remodel must be replacing existing stationary things such as wall texture, flooring, etc.  We have that.  An update is bringing your home from the 1990s into the current decade such as lighting fixtures and cabinet hardware.  We have that as well.  Of course, these are definitions a la Shelly, but seeing that I am a 44 1/2 year old, it makes me very, very wise. 

I'll be blogging about our changes going on.  I will warn you, however, that I will be keeping it very real around here.  You'll know when I mess up.  I get a lot of ideas from fellow bloggers.  I use their instructions.  It often does not turn out as expected.  It's probably me, I'll admit that.  HOWEVER, as many times as I've done things, I know that all these people couldn't have possibly done it correctly the first time.  That's the problem.  You watch HGTV all day and watch these professionals do it and you think it is so easy.  Then you try it. 

Fiasco. 

So, you'll be getting updates on our updates (I'm so witty!!).  But I'll be sharing our faux paus and my renegade ways.  My partner in crime will be Doug. My husband is great a doing a lot of things: electrical, moving 2x4s, sawing a log in half, but he is not allowed to caulk or do anything that requires fine motor skills. I'll admit right up front now that I am very independent, so waiting on my husband to come home a fix something isn't my cup of tea, so I will often improvise a solution so I can get on with the task at hand.  Case in point today:  There are quarters glued into the door jamb of the hall bath.  Yes, if you demo our home, take care with the bathroom door--you could be $1 richer.  We moved the door and used the existing door jamb.  The door opened a different way, so we had to install the door knob face plate thingy (really technical I know).  To make a long story short, I used 4 quarters to fill the circular hole from the drill bit and then applied wood filler on top so I could stain it.  I could have waited on Doug to come home and tell me what to do (he'd said something like 'just caulk it'--his standard answer for anything with a hole), or I could have run to JoAnns and purchased these wooden disks that would have been perfect for the hole.  But all that would have cost me time and I have too many projects going on to waste time, so I improvised. 

I'll warn you ahead of time, I'm not the best with pictures.  I have been taking pictures along the way, but I often forget until I get in the middle of a project.  But with my superior linguistic skills, I'll give you a picture with words.  You're captivated already aren't you!!

For you do-it-yourselfer's out there: one word of caution.  Read labels.  I about killed myself this afternoon.  Doug picked me up another can of orange peel texture spray.  It was different than the one I had previously used the day before.  It said oil-based on the can.  Andrei was taking a nap, so I closed the bathroom door and began my skillful spray on technique.  Within a minute my nose hairs were burning.  I opened up the bathroom window and inhaled.  Then I about peed in my pants when Tiger Lily jumped up at me and barked.  I literally had to go outside and just breathe some good ole fresh clean Texas air for a few minutes.  Then I read the can.  It's like all over it: USE IN A WELL VENTILATED AREA. 

No kidding. 


Free blog design by Adori Graphics using the Safari Sam digiscrapping kit by Adorible Digital Designs